Configuring Web Server
Most interaction with VC/m takes place through a web browser. A web server must be configured to host the browser-based user interface.
Caché or Ensemble

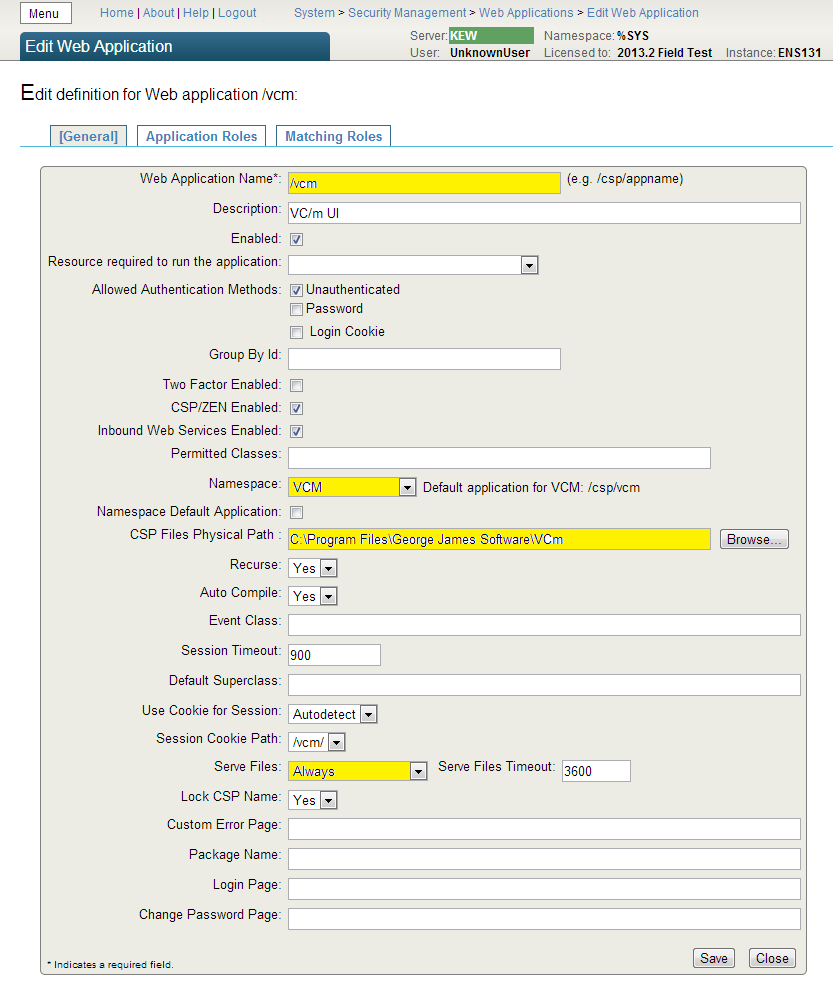
1. In Management Portal configure a Web Application (a.k.a. CSP Application) named /vcm to use the VCM namespace and to serve files from the directory you installed VC/m into.
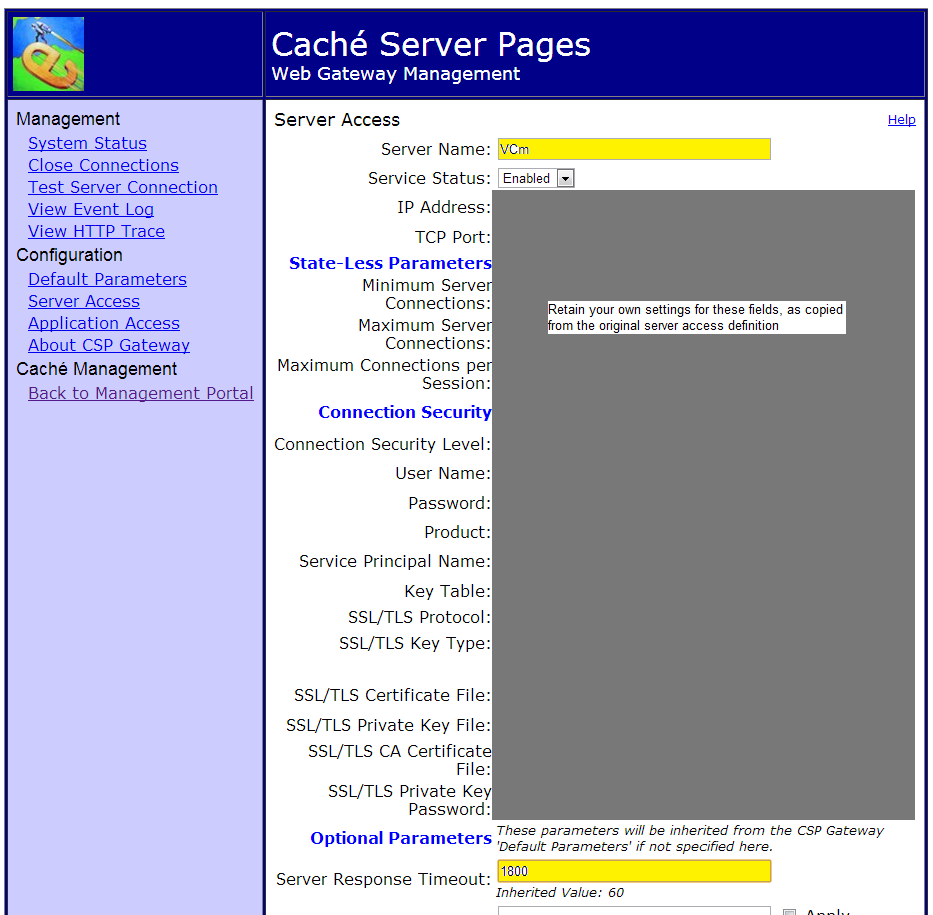
2. In the CSP Web Gateway Management console for the CSP-enabled web server that will host the VC/m browser interface, copy the existing Server Access definition to create a new one called "VCm" (for example). Give this connection a large Server Response Timeout (e.g. 1800 seconds). This is necessary because some operations performed in the VC/m browser interface may take a long time to complete and return their results.
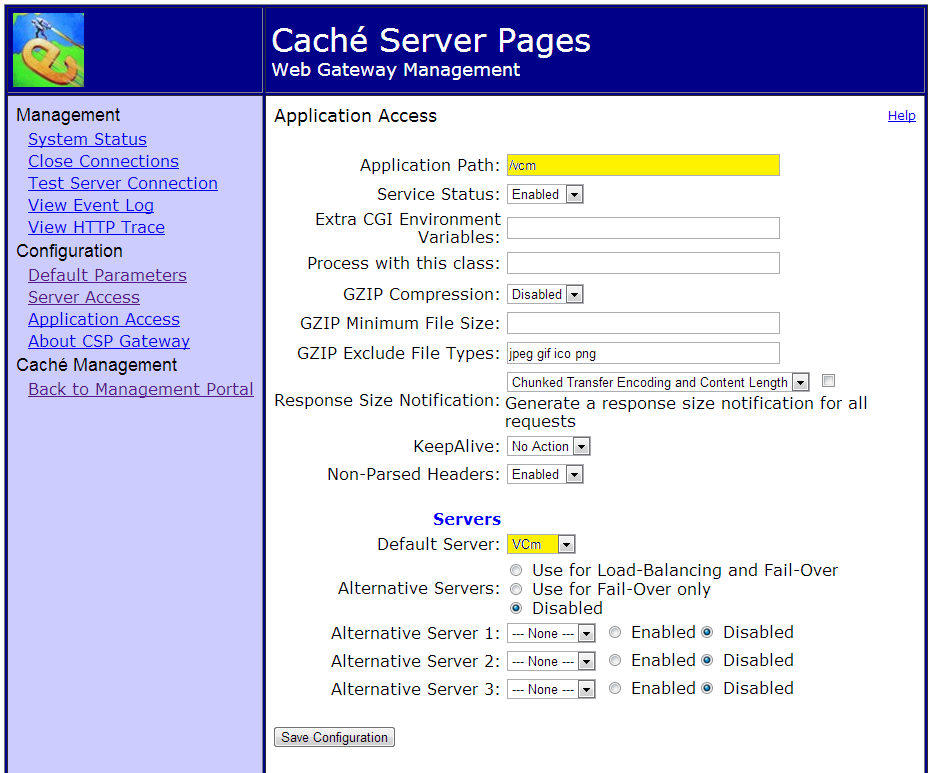
3. Under Application Access create a definition for the /vcm application, directing it to use the VCm server definition in order to benefit from the extended timeout.
4. Test the configuration by using Internet Explorer to visit /vcm/default.htm at the web server. For example, if your platform is Windows and you plan to access VC/m via the Apache instance installed by InterSystems for system management, the following URL may work on the server desktop: http://localhost:57772/vcm/default.htm
5. When the VC/m launch page appears, click the "VC/m Client (CSP)" button. This should
launch a new Internet Explorer window displaying the VC/m browser interface. A VC/m login window will also appear. Enter the username that was reported onscreen when you ran %vcins
earlier. If you do not have a record of this, run the following command in the VCM
namespace to discover the username: w $o(^%vcmf("user","")). The initial username has no password, so leave that field empty. Then click OK.
You should now be ready to start getting to know the interface and configuring your VC/m system.
6. If you wish to integrate VC/m with InterSystems security, read this article.
GT.M
1. ...
Next Step
Next, start working with VC/m.